Outdoor Point Cloud – Auto Plane Detection Overshoots Gable Shape. How Should I Edit the Roof Planes

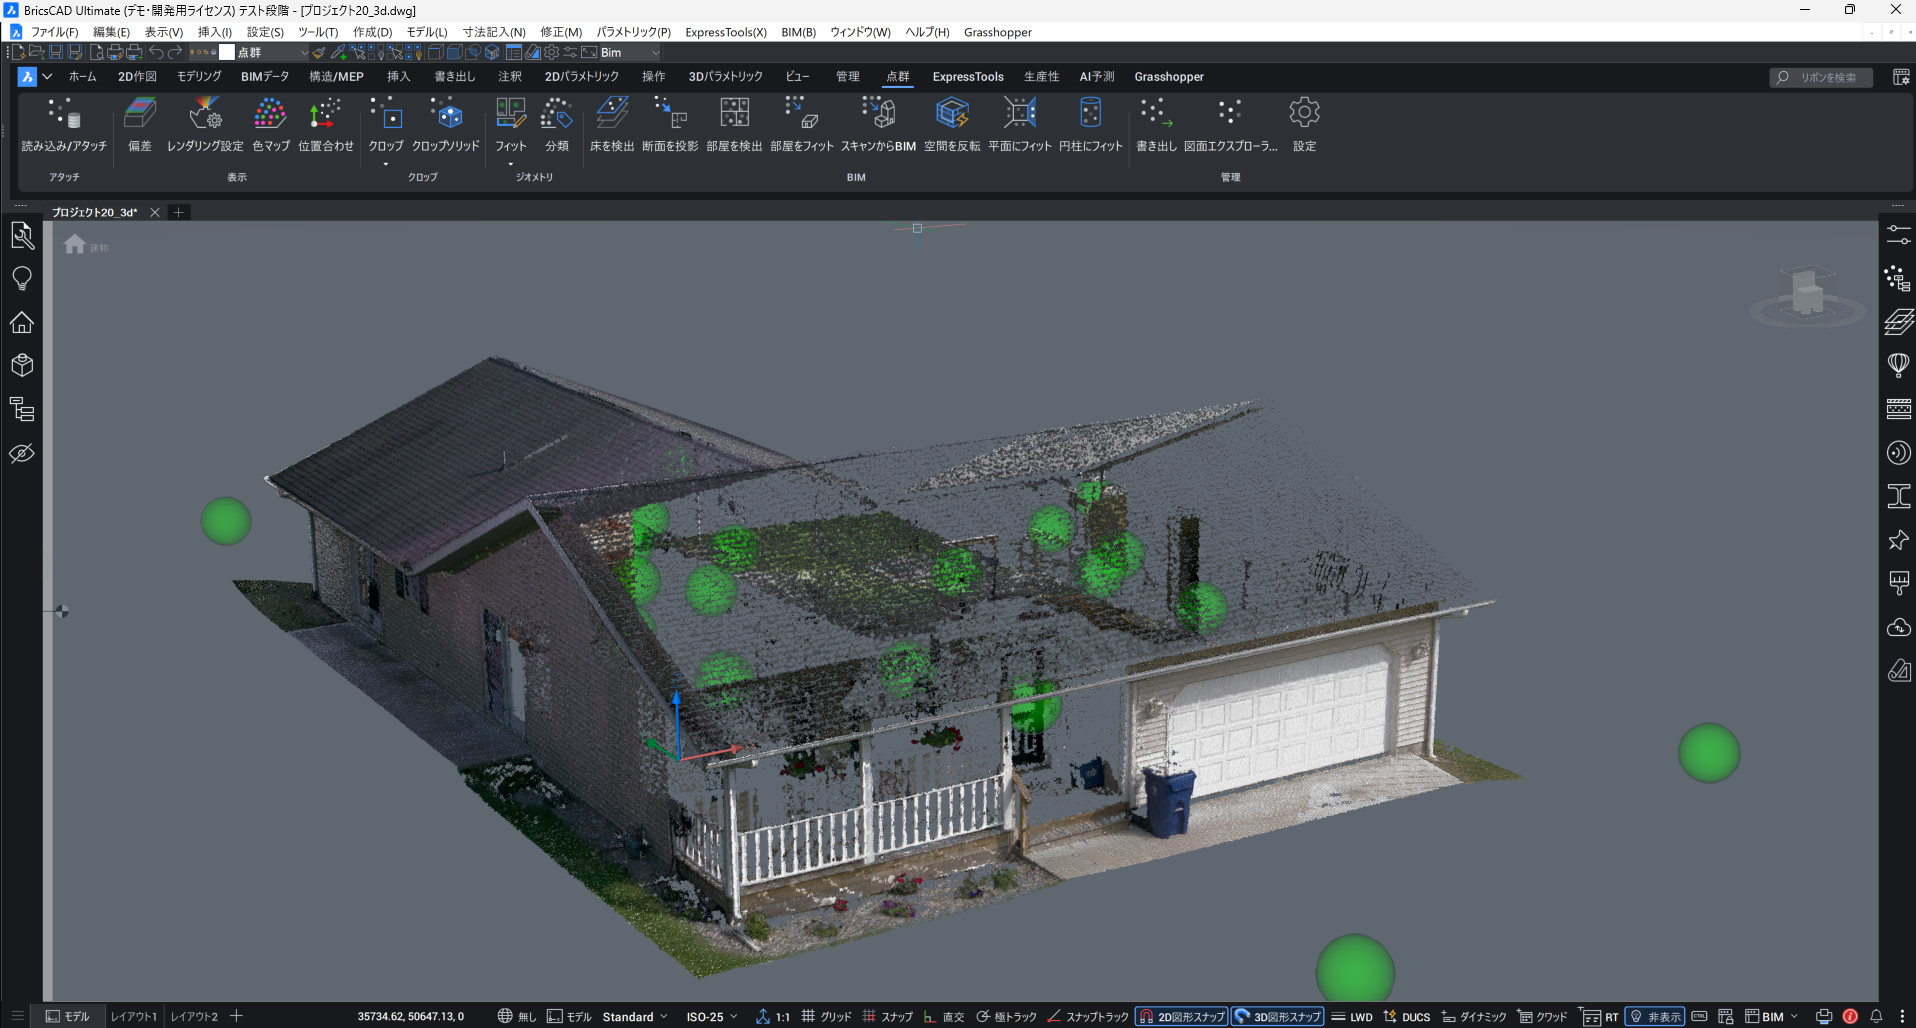
I am working with an outdoor point cloud scanned by a Leica BLK, and I’m using BricsCAD BIM to generate planes manually.
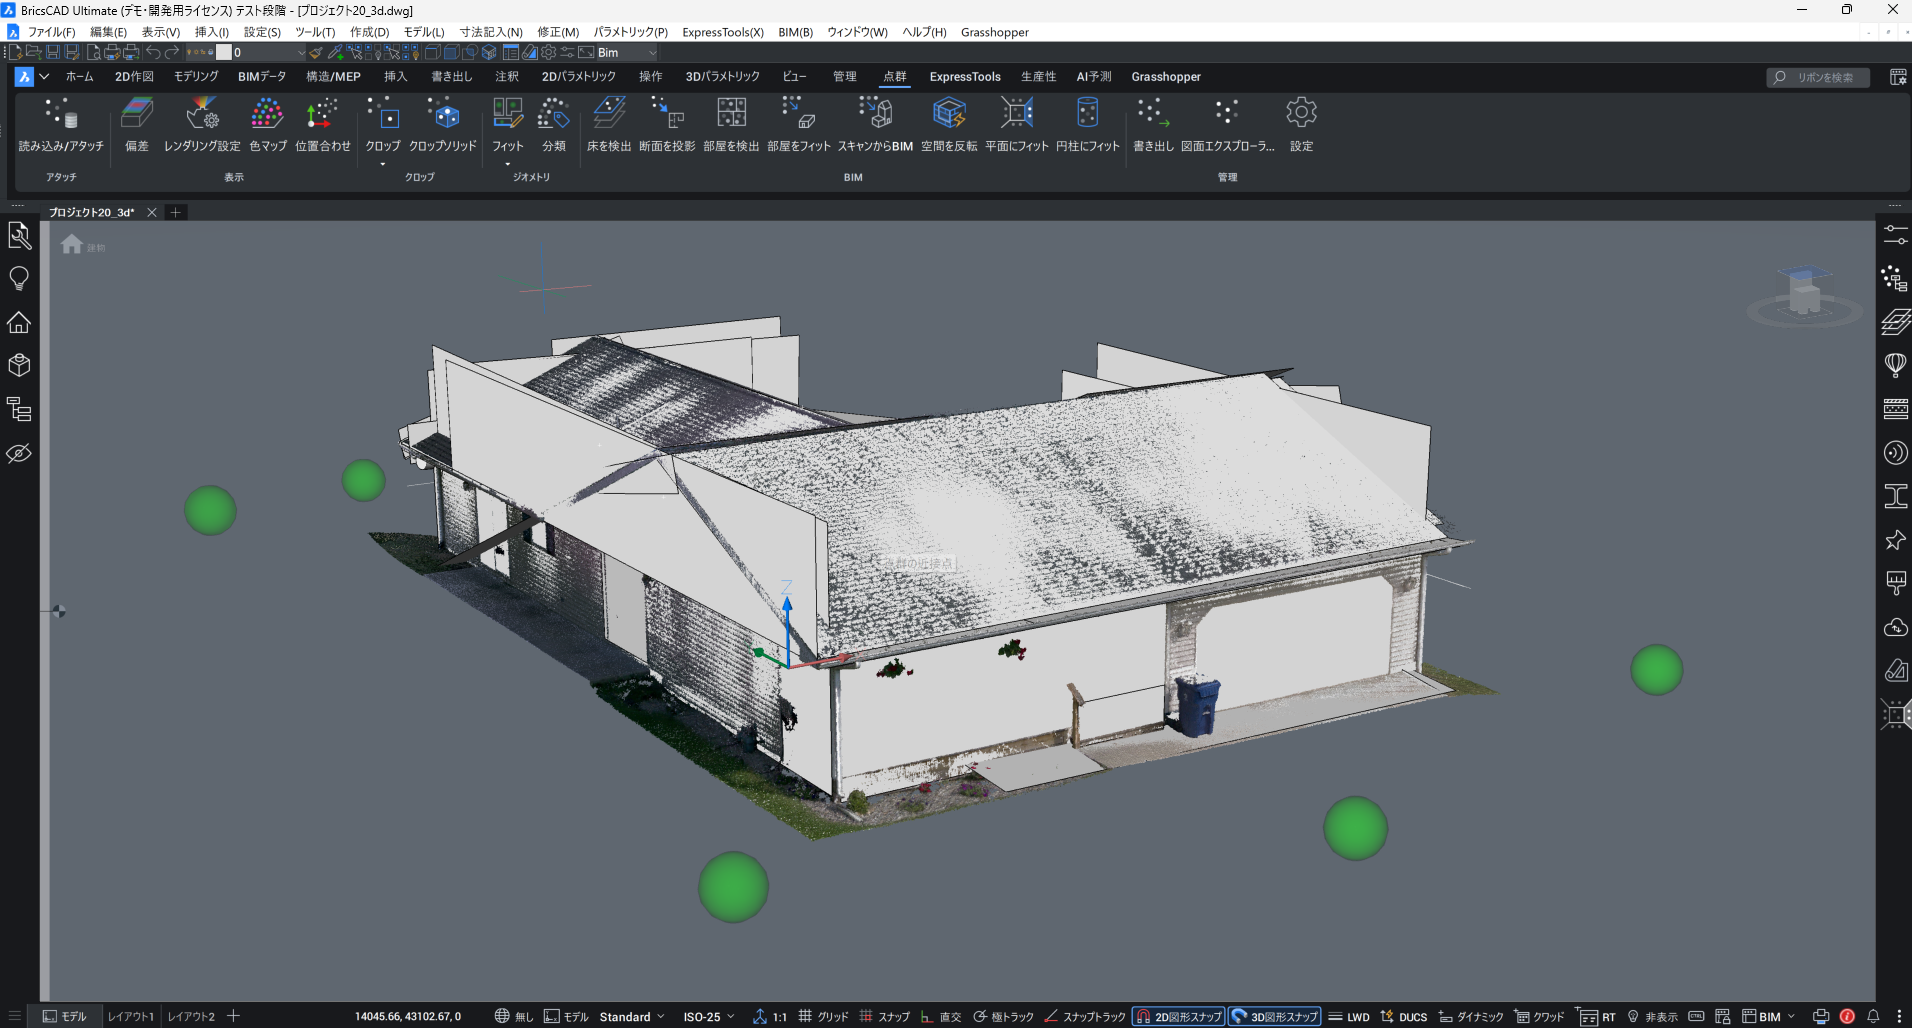
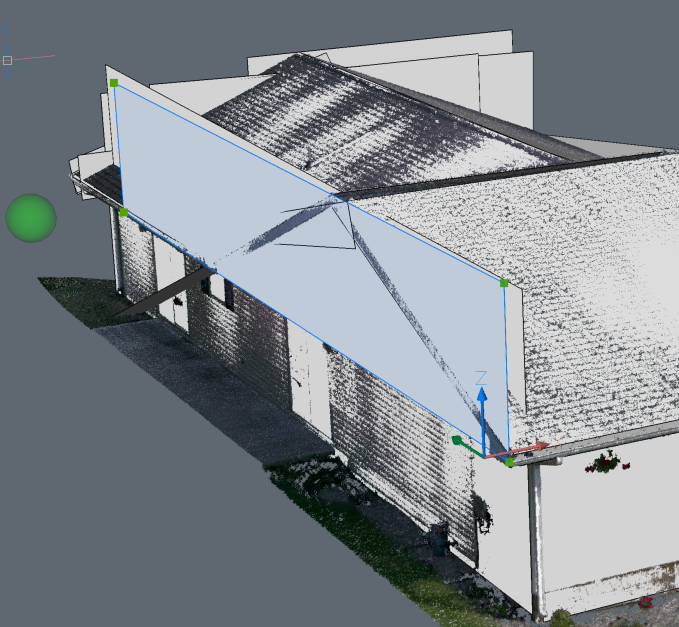
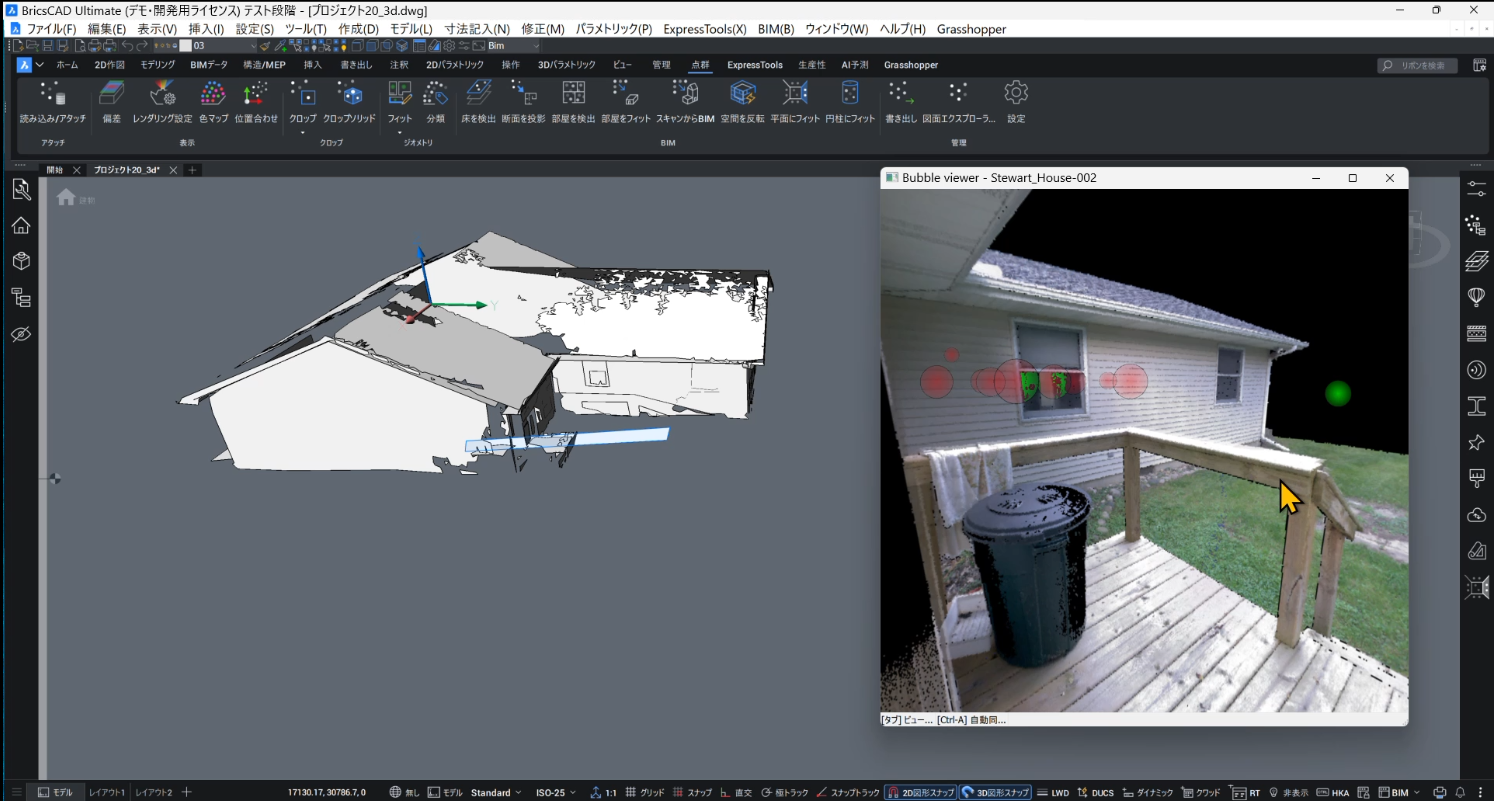
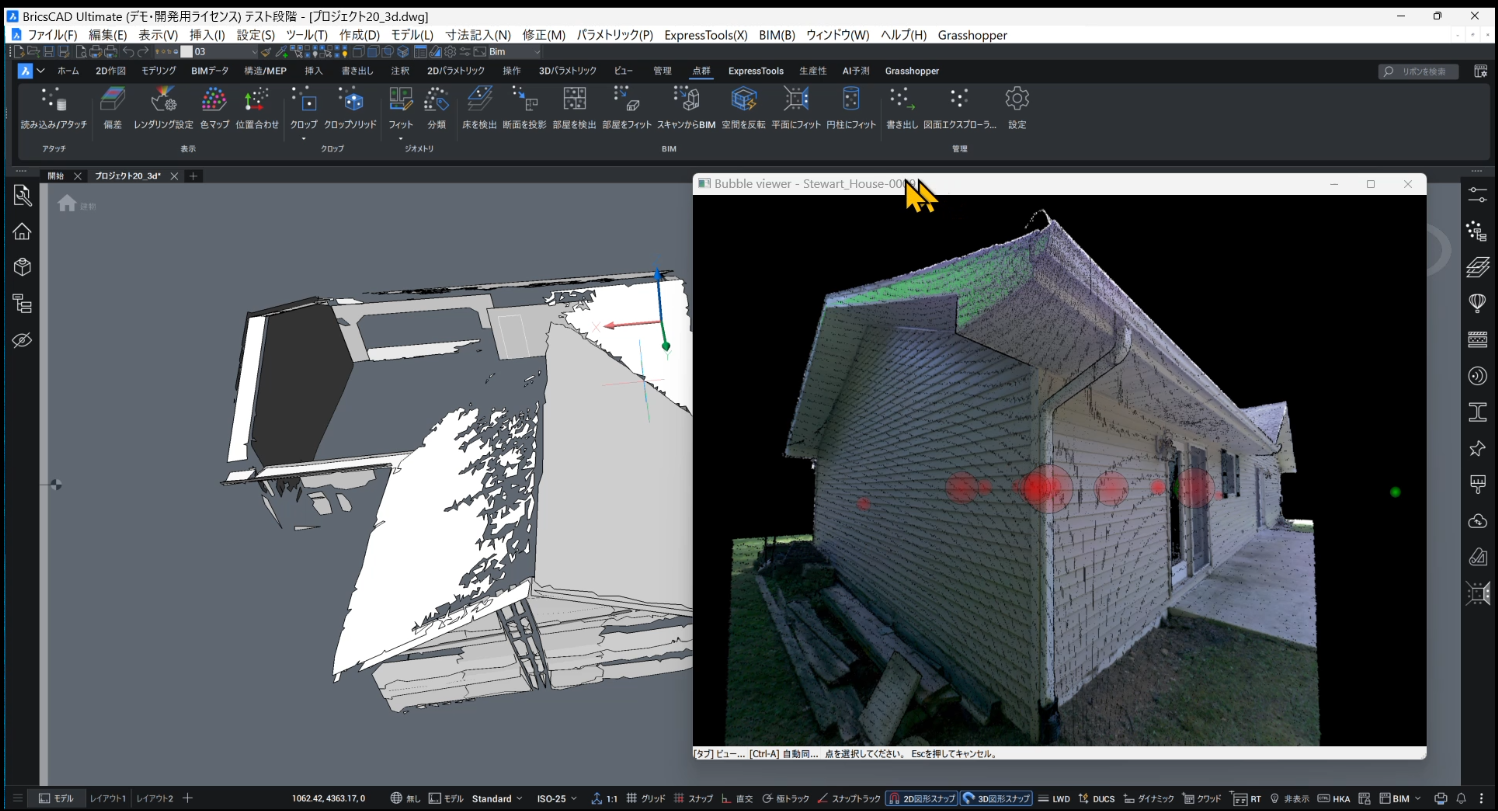
Since the point cloud is outdoors and the roof edges are not well-defined, the auto-detected planes extend far beyond the actual gable triangle (see image). The generated planes do not match the real roof boundary, and the software does not automatically trim them to the gable shape.
What I already tried
- I first attempted Scan-to-BIM → Convert to Solid, but the outdoor point cloud is too noisy, and the solids become unusable.
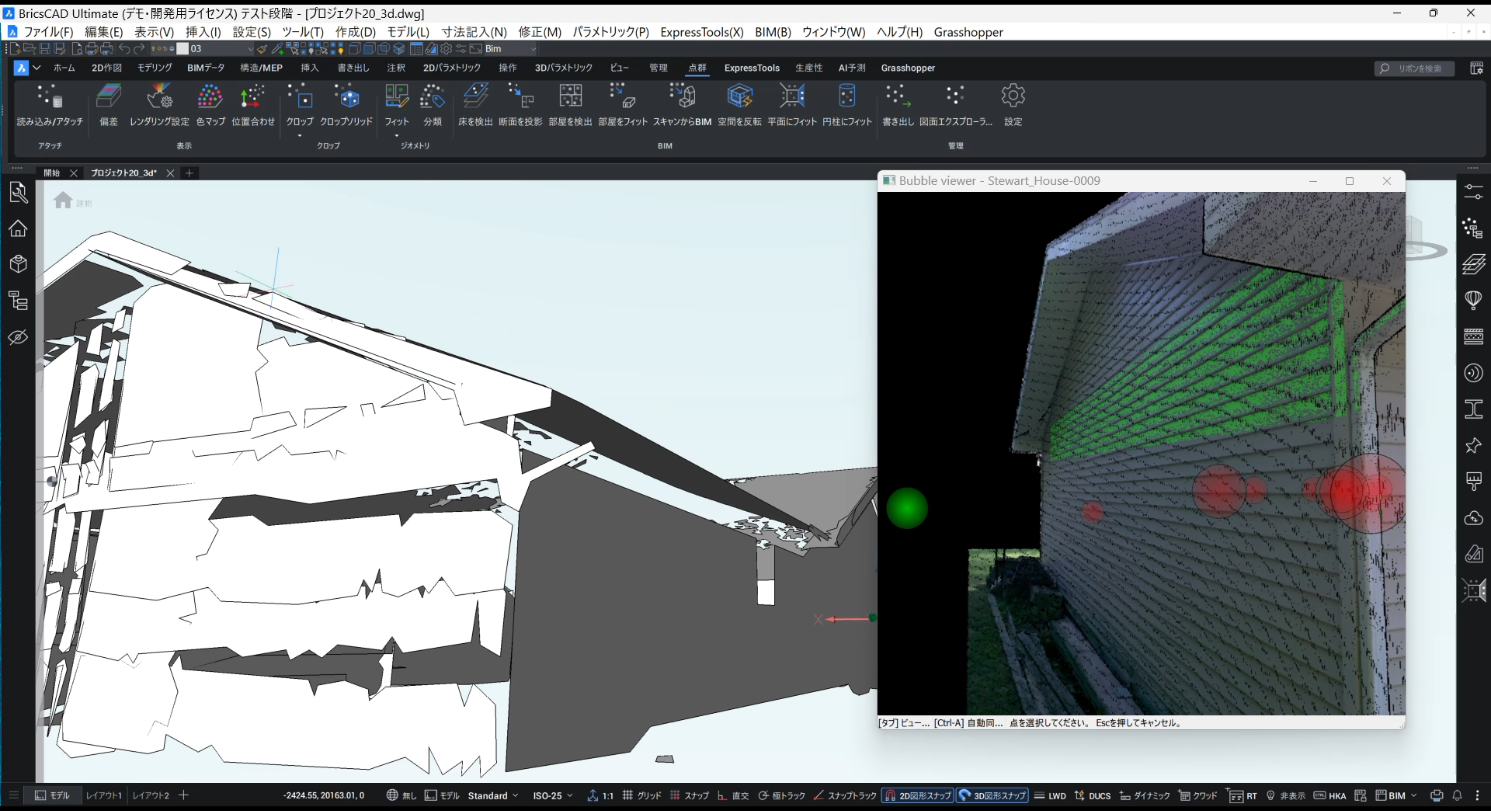
- That’s why I switched to the panorama sphere selection (green bubble) workflow and manually clicked the planes.
- This method works, but the resulting planes are always oversized and extend past the roof geometry.
My Question
Since the planes created from outdoor point clouds cannot match the roof’s gable boundaries automatically:
What is the recommended workflow to trim or edit these planes properly?
Additional Information
- The roof planes need to be cut exactly along the gable triangle.
- Automatic plane detection works, but lacks semantic understanding (e.g., identifying roof edges).
- I want to know the correct or commonly accepted editing workflow after auto-detecting planes in outdoor scans.
What I’m looking for
✔ Best practices for editing oversized roof planes
✔ Whether I should convert them to surfaces and trim them manually
✔ Whether I should use boolean operations with vertical gable planes
✔ Or if there is a smarter or more efficient workflow used internationally
Any advice from users with outdoor Scan-to-BIM experience would be greatly appreciated!
Comments
-
There is a "Adjust borders" option when you create planes using POINTCLOUDFITPLANAR, you might be able to use this option to get the accurate plane corners.
You will need to manually select the 4 corners of your plane.
1 -
Appreciate it!!! Let me fit it again.
Thanks again — this looks promising!
I’ll report back after testing.0 -
Definitely try:
Stitch surfacesStitches adjacent surfaces selected in the rapid selection mode.Note: Rapid selection is activated by holding down the Shift key.
(hold shift key down when clicking the second plane)
1 -
I used the outline to generate the exterior walls and roof planes, and the result is much better than when I was using rectangles before.
However, I’m still not very familiar with the door/window snapping tool. I’m also not sure about the best way to clean up these planes and make the model neat and organized.
Any advice or recommended workflow would be greatly appreciated. Thanks!
1 -
You have done really well to get far with these tools in my opinion. It maybe just me but I have struggled to get this working consistently and so that it's useful.
0
